About The Steam Era Freightcars Blog

This blog discusses all aspects of North American freight cars of the steam era, from the dawn of railroading through 1960.
It is intended to support the efforts of model railroaders who wish to produce the most prototypically accurate freight cars possible.
Prototype modelers are encouraged to participate in this blog. Please consider sending photos of prototypes and your efforts to model them, reviews of kits, books and other products, “articles” about your modeling efforts – with or without photos. The nature of blogging means the material can be "real time," and in-process models can be shared. These are not only welcomed, but appreciated as we all love to see a model develop over time.
Also welcome is information about upcoming prototype meets, shows, and other events.
Information submitted for this blog is considered gratis. Also, all submissions must include your name and contact email.
For more information or to submit information email steamfreightcar@gmail.com.

Showing posts with label Sunshine Models. Show all posts

Thursday, February 18, 2021

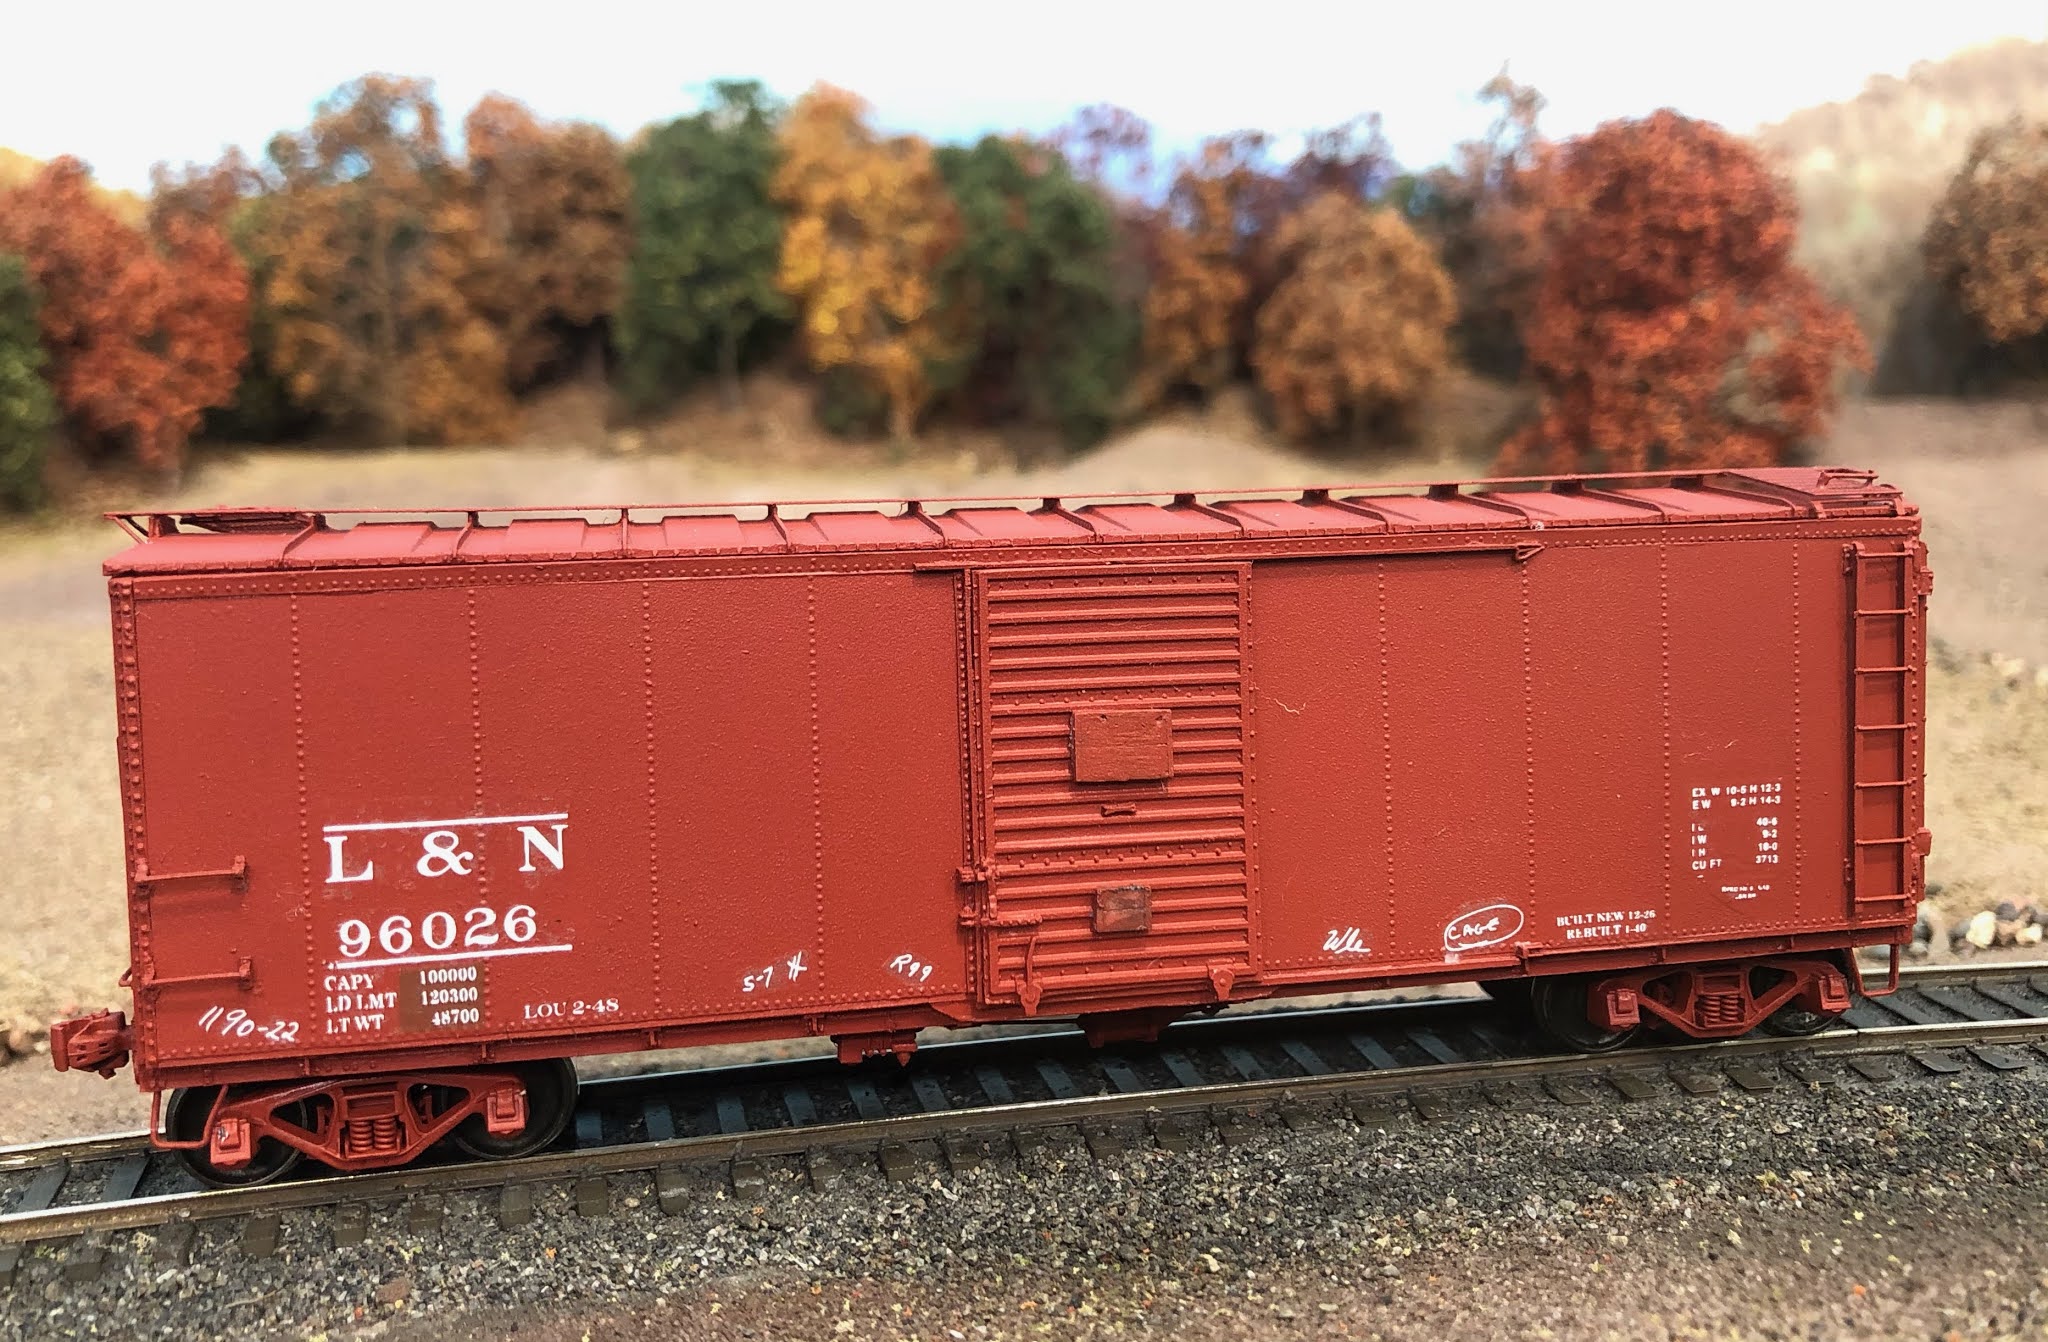
L&N Rebuilt Boxcar


Yet another half started freight car project that I've dug out of the box and completed. This is a Sunshine Models L&N rebuilt boxcar with Murphy ends, Sunshine Kit #64.11. I likely replaced the bracket grabs, ladder, and brake wheel that came in the kit with other after market parts. I did use some bits and pieces of Speedwitch's L&N boxcar decals (which are not specifically made for this car) to complement the kit decals. The carman's chalk marks are a combination of various Sunshine decals. It obviously still needs a little running weathering. That's the basic description of thing, but there's really a little more background to why I built this particular car. 

Back when Sunshine Models hosted the Naperville RPM meets, Martin Lofton, the owner of Sunshine Models, often asked me to do an ongoing hands-on display showing people how to build these resin cars.. One "perk" for doing this was I'd often get early access to the coveted Sunshine "sale room" before it opened for the other attendees. In this case he'd sent me the kit before the meet so I could get some of the basic assembly work done beforehand. I'm not sure I would have chosen this car on my own, since I haven't seen an L&N boxcar, let alone a pre war rebuild, in a photo on my prototype. 

What really pushed this one to the top of the "finish it" pile was the passing of my good friend Bill Welch. Bill's first modeling love was the railroads of the Southeastern U. S., which he often called "Y'All Railroads." I'd gotten to know him on the prototype modeling "circuit" - and always appreciated a chance to visit with him. When I moved to the DC area Bill still lived here, and he organized several informal prototype modeling "show and tell" get togethers. Very small, very informal, and great fun. 

Bill had sent me an email in late 2019 asking for my help in designing a small switching layout. We went back and forth on that a few times, and then several months passed. It was sometime last summer he wrote to tell me of his cancer diagnosis. By November he was gone. 

I realize it's been a few months since Bill passed away, but I figured what better tribute to a friend than to finally finish up this Y'all road boxcar. 

It seemed doubly appropriate since the very last email I received from Bill was a response to my question - "What color should I paint this thing?" 

He recommended Badger's Light Tuscan Oxide Red. I don't really like Badger's paints after some truly miserable experiences with them early on. But Bill seemed adamant about this brand and color so that's the paint I used. 

Perhaps they've improved the paint somehow? 

Or perhaps Bill was looking over my shoulder? 

In any event, if you don't like the model take it up with me. But if you don't like the color, you'll have to discuss that with Bill. 


Thursday, September 5, 2019

L&N Rebuilt boxcar

Sunshine Models Louisville & Nashville rebuilt 40-foot boxcar - ready for a trip to the paint booth. 


Saturday, January 19, 2013

Tips & Tricks: Future To the Rescue?


By Marty McGuirk
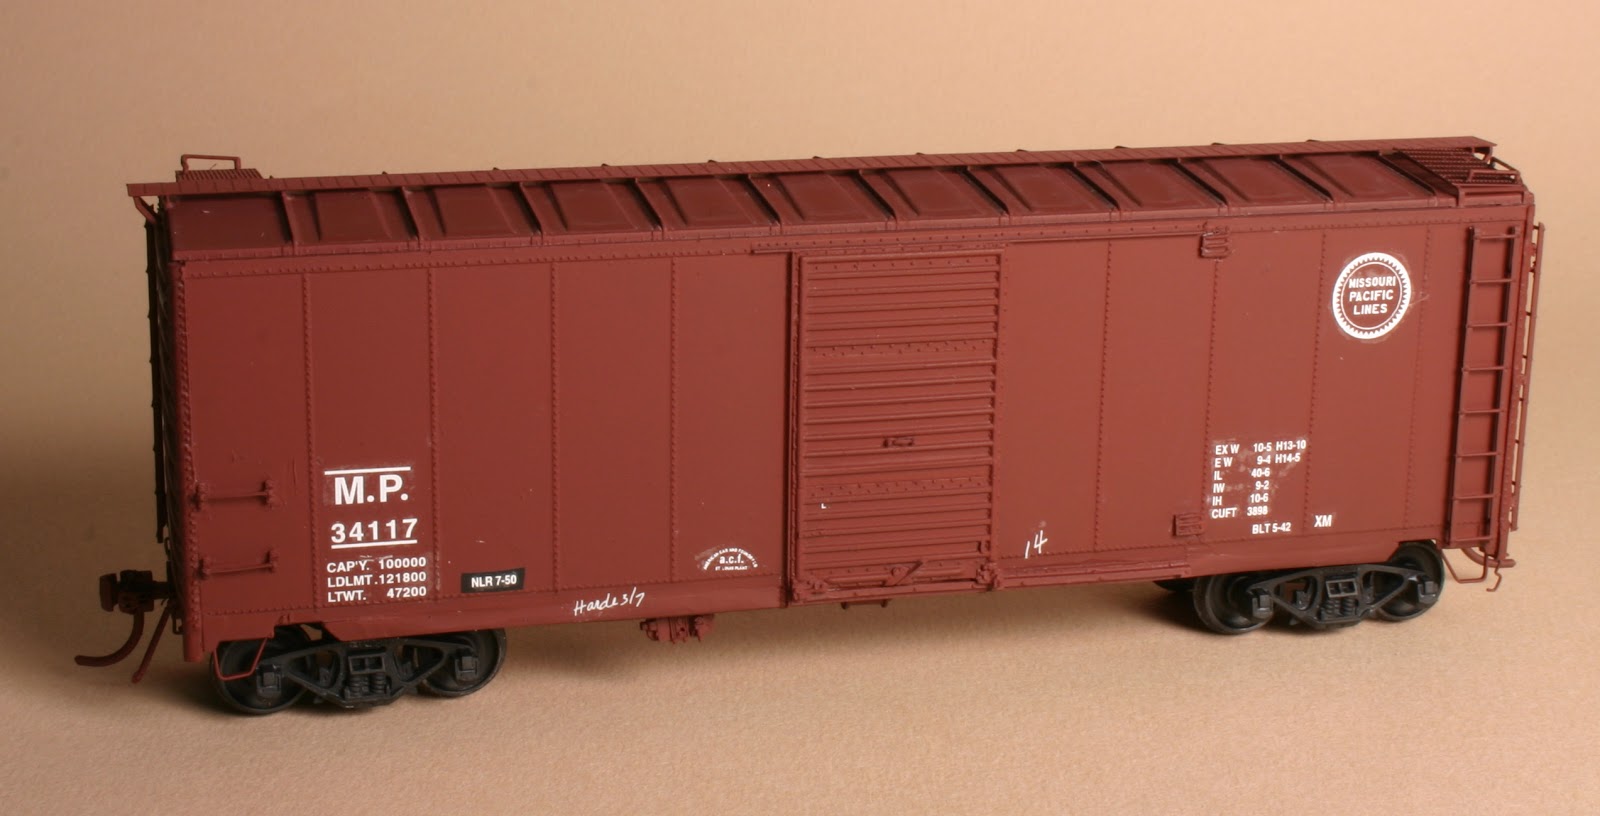
Building rolling stock is perhaps my favorite part of the hobby. Since I profess to like it so much, you shouldn’t be surprised that I think building, painting and decaling a single-color boxcar should not be that much of a challenge. Then I ran into this project – a Missouri Pacific 10-6” 40-foot boxcar.
The origin is one of the Sunshine Models “doorprizes” from the Naperville Railroad Prototype Modelers shows Martin and Patricia Lofton sponsored for years.  
These varied by year - some are loads, and one year it was a complete CB&Q flat car, but most have been an assortment of resin details (doors, ends, etc . . .) to convert an injection molded plastic car to some specific prototype. I have ten or so of these and they all produce some pretty neat and unusual transition era freight cars.
The building process went remarkably well.  The door prize parts were installed on an undecorated InterMountain 10’-6” AAR boxcar, and I even replaced most of the Intermountain details (ladders, brake rigging and the like) with after-market parts.  I rearranged the brake components to match the prototype (which differed from the stock Intermountain arrangement and fashioned the underbody piping from appropriate sized brass wire.


I photographed the finished, but unpainted car and then sprayed the model with Polly Scale acrylic paint.  Then, like usual, I gave the model a clear gloss coat (Polly Scale Clear Gloss) and applied the decals. I finished decaling and applied the final clear flat overcoat. Since I didn’t have a spray booth, and didn't have any Polly Scale Flat Clear, I used Testor’s Acryl Clear Flat – which is a brand more commonly used for military models and the only one available from the closest hobby shop. 
It was the first time I tried using this stuff (lesson learned, experiment on old Athearn “blue box,” not a model you care about!).  Whatever the cause, when the stuff dried it left a visible, white, streaky haze. Perhaps I got an old bottle of the stuff.
What a mess.


I studied the model, and figured the basic car was worth the effort to strip and refinish it.  But recently I’d been reading in FineScale Modeler about using Future Floor (now marketed as “Pledge with Future Shine) as a decal clear coating. I have some of the stuff, so I figured I had nothing to loose.  If it worked, great, if not, it was just one more layer to strip. I lightly brushed a coat of Future on the sides and left it to dry overnight.  
This next morning the silvering had all but disappeared. Better yet, that cloudy streaking was Gone!! I think the remaining issues with the finish can be hidden with some careful weathering. Once the model is weathered, I'll post a follow up. In the meantime, I think I'll use Future to do the decals on my next rolling stock model. I still haven’t figured out acrylic clear flats. Believe I stick with good ole’ Dullcote for now!