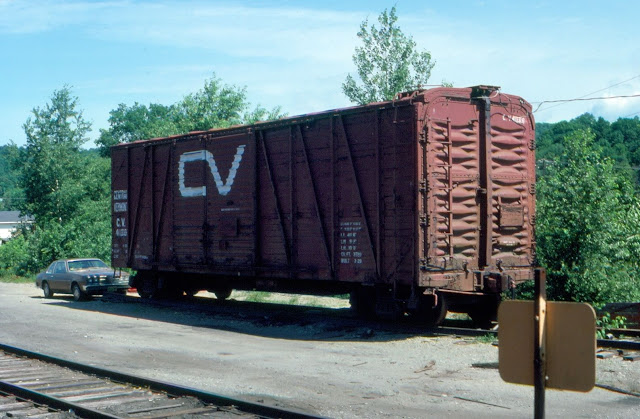
About The Steam Era Freightcars Blog

This blog discusses all aspects of North American freight cars of the steam era, from the dawn of railroading through 1960.
It is intended to support the efforts of model railroaders who wish to produce the most prototypically accurate freight cars possible.
Prototype modelers are encouraged to participate in this blog. Please consider sending photos of prototypes and your efforts to model them, reviews of kits, books and other products, “articles” about your modeling efforts – with or without photos. The nature of blogging means the material can be "real time," and in-process models can be shared. These are not only welcomed, but appreciated as we all love to see a model develop over time.
Also welcome is information about upcoming prototype meets, shows, and other events.
Information submitted for this blog is considered gratis. Also, all submissions must include your name and contact email.
For more information or to submit information email steamfreightcar@gmail.com.

Showing posts with label 40-foot Boxcar. Show all posts

Saturday, July 2, 2022

Pulpwood Delivery

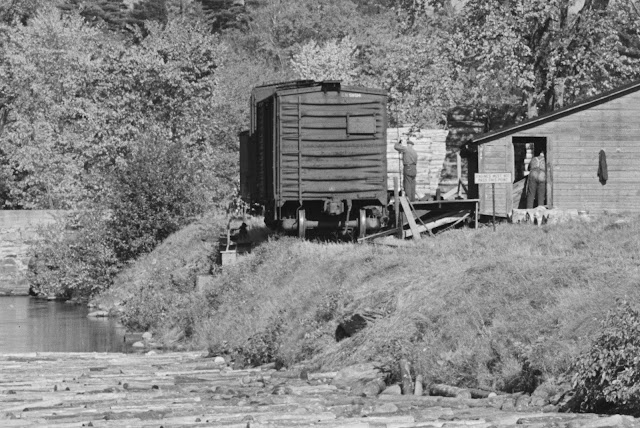
The CN boxcar is just one of the many interesting details visible in this photo. Jack Delano photo, Library of Congress, Sheldon Springs, Vt., September 1941. 

In the steam era boxcars hauled virtually every commodity that didn't need to be temperature controlled. That included dimensional lumber and pulpwood. 

The reporting marks on the car end are CN 511534, marking this as one of a large class (~1,700 cars) of Canadian National single sheathed boxcars. 

Sylvan Scale Models and Steam Shack (F&C) both offered these cars as HO scale resin kits over the years. And Ted Culotta's Essential Freight Cars (Number 8, November 2003 RMC) gives additional details on these cars. 


Thursday, February 18, 2021

L&N Rebuilt Boxcar


Yet another half started freight car project that I've dug out of the box and completed. This is a Sunshine Models L&N rebuilt boxcar with Murphy ends, Sunshine Kit #64.11. I likely replaced the bracket grabs, ladder, and brake wheel that came in the kit with other after market parts. I did use some bits and pieces of Speedwitch's L&N boxcar decals (which are not specifically made for this car) to complement the kit decals. The carman's chalk marks are a combination of various Sunshine decals. It obviously still needs a little running weathering. That's the basic description of thing, but there's really a little more background to why I built this particular car. 

Back when Sunshine Models hosted the Naperville RPM meets, Martin Lofton, the owner of Sunshine Models, often asked me to do an ongoing hands-on display showing people how to build these resin cars.. One "perk" for doing this was I'd often get early access to the coveted Sunshine "sale room" before it opened for the other attendees. In this case he'd sent me the kit before the meet so I could get some of the basic assembly work done beforehand. I'm not sure I would have chosen this car on my own, since I haven't seen an L&N boxcar, let alone a pre war rebuild, in a photo on my prototype. 

What really pushed this one to the top of the "finish it" pile was the passing of my good friend Bill Welch. Bill's first modeling love was the railroads of the Southeastern U. S., which he often called "Y'All Railroads." I'd gotten to know him on the prototype modeling "circuit" - and always appreciated a chance to visit with him. When I moved to the DC area Bill still lived here, and he organized several informal prototype modeling "show and tell" get togethers. Very small, very informal, and great fun. 

Bill had sent me an email in late 2019 asking for my help in designing a small switching layout. We went back and forth on that a few times, and then several months passed. It was sometime last summer he wrote to tell me of his cancer diagnosis. By November he was gone. 

I realize it's been a few months since Bill passed away, but I figured what better tribute to a friend than to finally finish up this Y'all road boxcar. 

It seemed doubly appropriate since the very last email I received from Bill was a response to my question - "What color should I paint this thing?" 

He recommended Badger's Light Tuscan Oxide Red. I don't really like Badger's paints after some truly miserable experiences with them early on. But Bill seemed adamant about this brand and color so that's the paint I used. 

Perhaps they've improved the paint somehow? 

Or perhaps Bill was looking over my shoulder? 

In any event, if you don't like the model take it up with me. But if you don't like the color, you'll have to discuss that with Bill. 


Saturday, December 5, 2020

Richford Branch Extra - Coming and Going - and notes on a side trip to Maine


This pair of Stan Bolton images, that I am sharing courtesy of Stan's good friend George Corey, show a pair of Central Vermont Consolidations (#s 465 and 466) working the daily local through Sheldon Junction, Vt., on an obviously "chilly" February 23, 1957. 

A few of the cars are fairly easy to identify (Click on the images to enlarge). 

I'll go first - the lead car in the second image is a Central Vermont 40,000-series boxcar. Typically one of these cars was used to handle LCL on the Richford job. 

A side note:

Almost exactly two years to the day before this image was taken, no. 466 and her sister no. 471 were both sent to the Grand Trunk (NEL). No. 466 made exactly one trip - actually less than one trip - when she experienced mechanical problems on an Island Pond to Portland, ME extra and was promptly returned to the CV.  

No 471 faired much better than her sister on her assignment to Maine. She remained on the GT (NEL) through the end of August 1955 where she made 24 mainline trips, primarily on wayfreights. She even made a half dozen or so trips hauling passenger train no. 16, and spent 36 days as the Lewiston branch engine. 

Obviously the St. Albans shop crew fixed whatever ailed no. 466 and she's steaming pretty well in these shots.  


Tuesday, October 1, 2019

Central Vermont 41,000-series boxcars - notes

Considering their relatively small numbers, these cars seem to come up on the Steam Era Freight Car List with surprising regularity. They reared their heads again a month or so ago on that list. My response with a couple of tidbits about modeling these cars may prevent you having to dig through the archives at groups.io and help with your models of these cars. 
These cars were in service for a very long time – through the late 1960s, but they really didn’t change in appearance all that much over the decades.
For perhaps more detail than anyone wants on these cars, I’d refer you to the following:

  • Ed Beaudette did an article in MR (August 2001 I recall) that included prototype drawings of the CV/GTW 1-1/2 door as built cars (CV's 41000-series).
  • There were a set of drawings in Mainline Modeler sometime in the late 1980s – in that case they were shown as listed as GTW cars, with no mention of the Central Vermont.
  • The best reference for these cars is Steve Horsley’s article (which is part of an outstanding ongoing series on CV freight cars) in Volume 24, Issue #4 f the CVRHS “Ambassador.” I’d highly recommend checking that issue out.

Over the years I’ve built a dozen or so more of the Steam Shack/Funaro resin kits. A couple of things to note on the F&C kit include:  

  • The end door casting kind of just hangs above the roofline and doesn’t really capture the beefy look of the prototype on the B end of the car. See this photo of the door end, and compare with the F&C model to see what I mean:


  • My F&C kits (like me, they’re old!) came with regular ladders – some of the newer F&C kits come with Tichy “Canadian” ladders – neither of these are correct. The CV cars had an integrated sill step (basically the “stirrup” is welded to the ladder stiles, not the car side), but the shape of the step on the Tichy ladder isn’t correct.
  • Compare the side ladder and stirrup in this photo of a 44000 series car with the Tichy part to see what I mean:

  • The cars had wood running boards through most of their service lives. It’s possible a few of them may have received steel running boards, but I’ve never seen any photo evidence of such. I have seen some of these cars with steel brake platforms.


Now we get to the issue with these kits that comes up whenever we discuss them – the trucks.
The cars rode on cast steel ARA U-section trucks with spring planks and Barber lateral motion bolsters equipped with six springs per side frame--a style called "increased spring capacity trucks" by several manufacturers.
The MR article reference above states the ECW 9074 70-ton "Bettendorf" trucks are closest. That’s a typo – it should be 9064 (I started editing the article, but had left the MR staff before it was published and a couple of minor, but annoying errors, such as this one, crept into the copy.) 
I got the reference to those trucks after extensive back and forth with Richard Hendrickson – and though those ECW trucks might look the closest, I’ve never bothered using them, or even trying to find a set since the operating qualities of ECW trucks are marginal at best.  
For many years I used good-ole' Kadee "Bettendorf" trucks under these cars. Starting several years ago I substituted Tahoe Model Works 50-ton Dalman 2-Level trucks. While certainly not an exact match they roll well, and at least have a large number of visible springs when viewed from the side.  
As a side note, my first item published in a “real” model railroad magazine was a review of this kit (marketed by Steam Shack but produced by Steve Funaro). Just for fun, here’s a photo of that model – warts and all - including its completely incorrect Kadee "Bettendorf" trucks! - on Paul Dolkos’ former B&M White Mountain Division: 


Thursday, September 5, 2019

L&N Rebuilt boxcar

Sunshine Models Louisville & Nashville rebuilt 40-foot boxcar - ready for a trip to the paint booth. 


Tuesday, October 21, 2014

The rumour is true

Yarmouth Model Works is developing 40' boxcar kits in HO scale featuring the AC&F proprietary end and roof.
You can see photos of the parts here, http://elgincarshops.blogspot.ca/

Wednesday, August 20, 2014

Central Vermont 40,000-series Howe Truss Boxcars


By Marty McGuirk

The Strasburg Railroad in Lancaster, PA, is home to a number of nicely restored steam era freight cars, including a Central Vermont 40,000-series car (the Pennsylvania State Railroad Museum directly across the street also has an impressive collection and is well worth a visit).
When I was up there in mid-November of 2012 the car wasn’t in the best place for photography, but I managed to get a couple of pictures in the late-afternoon light that show off the details of the car.
 History
The Central Vermont received 200 of these single-sheathed 40-foot boxcars from American Car & Foundry in late 1924. These cars, numbered 40000-40199, represent some of the earliest examples of what are commonly referred to as “alternate” standard ARA boxcars. Although never proposed as a standard by the ARA’s Committee on Car Construction, more cars were constructed to this Howe truss design with two diagonals on either side of the door, than were built to the ARA standard single sheath design. 
The underframe was wood, with six stringers in place of the typical single pair of steel, Z-section stringers.

Closeup of the end of the restored car shows the ladders,
the top end plate, and the Carmer uncoupling lever.
 
 The CV’s cars were delivered with wood six-foot doors, Andrews trucks, and Hutchins roofs. They had an inside height of 8 feet, 6 inches. As built, they were equipped with vertical brake staffs, but all would eventually be retrofitted with geared handbrakes and Ajax brakewheels. they also came equipped with Carmer uncoupling levers. The sides had seven grab irons, while the ends were equipped with six rung ladders with the stiles mounted far enough from the end to clear the diagonal brace on the end. 
AC&F Builder's Photo shows the vertical brake
and end components. 
The ends of these cars were perhaps their most unusual feature. They were composite ends (wood with two vertical and two diagonal braces). Spanning these braces across the top was a pressed steel component referred to as a top end plate. The Car Builder’s Cyclopedia, defines an End Plate as:

 “A member across the end and connecting the tops of the end posts of a car body and fastened at the ends to the two side plates. It is usually made of the proper form to serve as an end carline.”*

Other single sheathed cars with composite ends used end plates of course, but what seems to make the ones of the CV’s 40000-series cars somewhat unusual is the fact that it was a pressed steel component, not fabricated from standard structural steel components.
The cars remained in service, pretty much as built, through the late 1950s and early 1960s when many of them were retired or placed in some form of company service.
 Approximately 25 of these cars were modified with the addition of grain hatches to the roof and hopper bottoms for grain service.


 Painting and Lettering
As delivered the cars featured the CV’s then-standard Roman lettering, with “Central Vermont” spelled out across all three “panels” to the left of the doors, and no "CV" initials, with the car numbers centered underneath.
During the Second World War (January 1942), the CV changed to the stacked Gothic lettering, with the road name spelled out in two lines, with the addition of "CV" reporting marks above the car number, like that shown on the restored car at Strasburg, and on this car: 
Initially, there was a white line above the “CV and below the car numbers. In later repaintings through the 1950s these lines tended to be removed, like in this view of 40050:
 The final paint scheme on these cars was in the early 1960s with the addition of the intertwined CV logo on the door.

Models
A “layout quality” representation of these cars can be made using the old Train Miniature single-sheathed (incorrectly called by modelers “outside braced”) cars. John Nehrich described such a conversion in an old issue of Mainline Modeler, later reprinted in a book by Hundman Publications. Both are long out of print, but you can find old issues of Mainline Modeler at swap meets or on eBay.
About 15-20 years ago Steam Shack produced a series of resin freight car models for a number of CV boxcars, including the 40000-series cars. These models were made for Steam Shack by Funaro & Camerlengo, who still offers these as their Kit 7060 (as built cars) or Kit 7061 (cars equipped with roof hatches and hopper bottoms).
There are some issues with the F&C kit - the sides are rendered as heavily weathered - which some feel is a little on the heavy side (I tend to agree), making the model look like the prototype did late in life and not as these cars would have looked in service. There's also some issues with the ends - primarily the height of the end sill - on the resin cars it's much taller than on the prototype. But the Steam Shack/F&C kits do represent a good starting place for an accurate model. 

*Thanks to Dennis Storzek for his help in determining the most accurate description for the components of these cars. 

Sunday, August 17, 2014

Updating the Rutland PS-1 Boxcar


A comparison of Rutland PS-1 #100, as built and #194, with all updates completed.
Reprinted with permission of the Rutland Railroad Historical Society and authors Phillip Blancher & Kevin Pytlak. Article published in Winter 2014 (Volume 25, Number 4) issue of the Rutland Railroad Historical Society magazine, "The Newsliner."

By Phillip Blancher & Kevin Pytlak
All Photos by Phillip Blancher

Pullman Standard's PS-1 box Car is THE iconic piece of rolling stock that defined the vision Rutland Railway president Gardiner Caverly laid out for the railroad in the early 1950's, that of a modern, streamlined, service-oriented gateway that would rapidly move shippers products to market. If you are a model railroader modelling the Rutland in the 1950's or early 1960's, a fleet of these cars is a must. 
In the last 15 years, HO-scale modellers have been fortunate to have had two manufacturers release PS-1’s, and in 28 car numbers. Kadee's well-detailed model is presently available in four road numbers while Intermountain Railway Company has produced 24 different numbers under their own brand as well as for The Express Station and The Steam Shack. The Intermountain models have been updated along the way, meaning that there is some variation in the amount of detail on production runs. The Steam Shack's later releases included etched roof walks and improved paint and graphics. Updating the detail fidelity of the earlier Intermountain releases is not a difficult operation and can be done in stages. 
The first task for us was to consult any and all photos that could be found among the many sources available: books, issues of The Newsliner, and the Internet. Required information that could not be easily tracked down ended up as questions placed on the Steam Freight Car email list hosted on YahooGroups. Once sufficient information was gathered, a shopping list of items required to update the various PS-1 models was drawn up.
As an-built photo of the original kit, purchased used from a seller on Ebay.
Many of the earlier cars were purchased on the E-Bay auction website or on the YahooGroups HO Interchange email list. Some of the cars were purchased as un-assembled kits, but others were ready-to-run. This article will deal only with updates and changes to the fidelity of the car, and will not cover any repairs that had to be made to a previous owner's work.
Beginning with the wheels and working up from there, the trucks will need to be changed out. The Rutland PS-1's came with solid bearing, ASF A3 Ride Control trucks. These can be replicated with Kato part 31-601 which have excellent detail including brake beams. That said, the wheel sets were replaced with Intermountain Code-88 semi-scale wheel sets. In the interval that has passed since the parts were purchased for this project, Tahoe Model Works has released their own version of the ASF A3 trucks. They can be purchased with Intermountain semi-scale wheel sets, part number TMW-110/210. The detail level of these trucks is just as good as the Kato trucks and may be more readily available.
Continuing on to the brake rigging, the plastic pieces are easily broken when removing parts from the sprues. Where the lines could not be glued into place, new lines were bent from 0.015 brass wire. The angle cock, glad hand, and air line for each end of the car was replaced with Cal-Scale parts. The coupler boxes were drilled and tapped for 2-56 screws and Kadee #158 Whisker Couplers were installed in them. The trip pins were removed. 
Moving on to the car sides, the doors and ladders were installed as per instructions. End grab irons were replaced with wire pieces formed from phosphor bronze wire from Tichy Train Group. 
B-End details include etched
brake wheel platform, and brake wheel.
 
On the B-end of the car, the brake wheel was replaced. For cars 100-107, the Ajax brake wheel was used (Kadee Part number) while for cars 108-450, the Universal brake wheel was used (Kadee Part number). The brackets for the brake wheel platform were installed, but the plastic walkway material was not used. Detail Associates coupler lift bars were added using an eye bolt in the left corner and one attached to the coupler box. The lift bar is secured to the left corner of the car but only looped into the eye bolt on the coupler box. This makes access to the coupler box simpler should servicing be required.
Modifications to the A-end include
Kadee #158 couplers, grab irons,
and uncoupling levers.
The “Style-A” plastic stirrup steps under the side grab irons were replaced with bronze parts formed from A-Line. The stirrup under the ladder could be replaced with a “Style-B” brass part as well. 
Instead of using NMRA practices to weight the car, pennies were used. A penny weighs 1/10th of an ounce, therefore 15 to 20 pennies, centred along the middle of the floor inside the box car body, were glued in place. The doors were also attached at this time, followed by the roof. Elastic bands were used to hold the roof in place while the glue set.  
The Plano etched roof walk really makes this roof pop. The authors are members of the famed Yellow Roof Society so the roof walks were painted to match the roof.
A Plano Model Products #191 40' Apex Walkway set was installed as per that company's instructions, the parts having been painted before installation. To attach dissimilar materials such as metal to plastic, a thin bead of Canopy Glue was applied with a Microbrush. The Canopy Glue works well in this application because it dries clear and is flexible enough to allow for the different expansion/contraction rates of the materials. This helps prevent the walkways from popping off the model. 
Other than touch-up and painting the roof walk, no other painting is required. The roof walk was painted yellow to match the yellow of the roof. Badger Modelflex primer grey was applied first, followed by C&NW Yellow from the same brand. The truck frames were painted with Oily Black paint and the wheels with Burnt Umber mixed with Black on the wheel faces and wheel backs. This treatment helps suggest oil, dirt and grime from the solid bearing trucks. 
Updating the lettering to bring the cars up to the same level as the later Steam Shack releases was accomplished with decals from Train Detail Works by Jerry Glow. Two decals sets were released by TDW that cover all lettering for trust plate lettering, markings, and numbering. The first set covers the 150-299 series, while the second set augments the first with numbering and details for the 100-149 and the 300-450 series. 
One detail that is often ignored is car re-weigh markings. Since 1959 is the year being modelled, it means that lower-numbered PS-1's would have been re-weighed and should be re-marked accordingly. Most of the re-weights were done at the car shops in Rutland, but it would not have been unusual for them to have been re-weighed at Bellows Falls, Alburgh or Malone. With re-weighs, try to refer to photos of the prototype. 
Once the decals were finished, a thin coat of Testors Glosscote was airbrushed  over the car to seal the decals and to also cover any decal film residual that might still show. Modellers will often choose to Dullcote directly over the decals following their application but this can actually make the decal film stand out. Once the Glosscote has dried, a light application of Dullcote was made. Next it was time to get dirty with car weathering.
Using a combination of artist oils, washes and some acrylic dry-brushing to weather the roof, sides and ends of the car, the first task was to airbrush the underside of the car with thin coats of Badger Modelflex Dust, Dirt and Grime paints. Working from darkest to lightest, weathering was concentrated near the trucks. The trucks themselves and the wheel sets were weathered using poster stencil cream available from Michaels. 
Completed PS-1s #194 and #118 show off their worn paint before going into service.
For cars in the lower number series, some rust spots were added to the sides of the car in appropriate places, such as where the door may have banged into the side of the car when being opened. On the roof, extra rust was applied to areas where water would pool and collect, such as near the seams and ribs.  Always work from photographs and use oil paints for the rust because they have a slow drying time and are easy to wipe off if the results are not what is desired. A thin layer of Dullcote will dry the oils very quickly. A final coat of Dullcote was added to seal the weathering is applied once everything is satisfactory. 
With that the car is ready to be released from the shops and head back to revenue service on the layout. 

About the Authors:

Phillip Blancher is Membership Chair of the Rutland Railroad Historical Society and the resident web-geek for the RRHS web site. The father of four kids is a communications and marketing consultant for the newspaper industry and as a web developer. Based in Morrisburg, Ontario, Blancher models the Rutland circa 1959 centred around Malone, New York.

Kevin Pytlak is the former owner of The Happy Hobo in Tampa, Florida and a confirmed freight car nut. Father of one, Pytlak works for an IT-company in Tampa and moonlights as a drummer in a Christian rock band. His interests are primarily Seaboard Coast Line between 1967 and 1975. 

Parts List:

Kato 31-601
Solid Bearing, ASF A3 Ride Control truck
or
Tahoe Model Works 110/210 - Solid Bearing, ASF A3 Ride Control truck

A-Line 
29000 – Style-A Stirrup Steps
29001 – Style-B Stirrup Steps

Cal-Scale
190-276 – Air Hoses & Bracket

Detail Associates
229-2222 – HO Eye Bolt 3 1/2' dia long   
229-6215 – Freight Car Coupler Lift Bar

Intermountain
IRC40052 – 33'' Semi-Scale Brass Insulated Wheel Sets

Kadee
58 – Semi-Scale Whisker Coupler
2040 – Ajax Brake Wheel (Black)
2043 – Universal Brake Wheel (Black)

Plano Model Products
191 – 40-foot Apex Walkway

Tichy
1106 – 0.012" Phosphor  Bronze Wire
1102 – 0.015" Phosphor Bronze Wire

Rutland PS-1 150-299 Decal Set
Rutland PS-1 Supplemental Decal Set

Wednesday, August 13, 2014

Announcement: Yarmouth Model Works Wabash 40-foot 12-panel boxcar


By Marty McGuirk
I certainly don't need another resin freight car kit, but I couldn't resist this one. It's from my good friend Pierre Oliver's Yarmouth Model Works
The model depicts the Wabash's 88200-88699 12-panel welded boxcars. These cars were built in December of 1948 and were the first welded side cars purchased by the Wabash. 
As a Central Vermont modeler that might be interesting, but is hardly a big deal! 
What's neat about this kit is the way the resin sides have been cast to create the distinctive rippling that occurs in sheet steel when it's been welded. The effect is subtle, but apparent. And it's almost impossible to duplicate on an injection plastic kit unless the effect has been cut into the tooling. I remember seeing this effect on an N scale resin PRR boxcar years ago but, as far as I know, this is a first for a commercially available HO scale kit. 
In addition the kit features custom etched brass details, etched running boards, decals, and trucks. Everything but couplers. 
I've ordered mine - go to the Yarmouth  Model Works website if you want to get one of these, or one of the other kits he has available, for your railroad. 
And tell Pierre I sent you!